
In this tutorial, I will show you to use your Bubble data and workflow outside your no-code Bubble application. This is a huge feature that gives a lot of flexibility when it comes to system integration. This tutorial shows you exactly the aspects of API Keys, user tokens, and data privacy. Let's go and learn how to use your data outside your no-code Bubble application.
In order to enable your application API to be exposed, you would need to set up two things.

Bubble.io data and workflow API
3. Create an API-Key for your external application. In order to enable backend-to-backend communication, we need to create an API-Key. This key would need to be placed in your other application (Adalo, custom application). Don't waste your time copying the key below. I deleted everything after the tutorial - sorry ;)
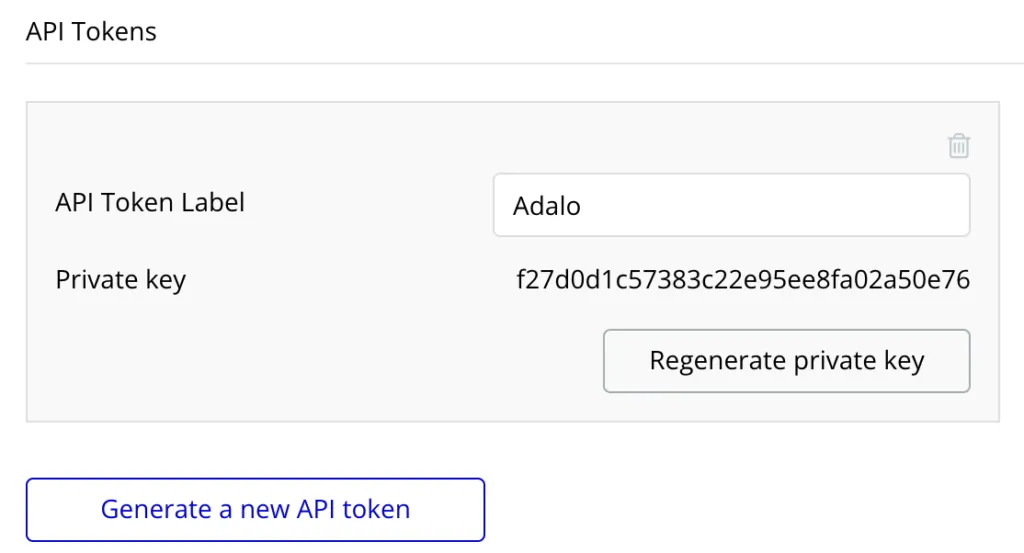
API token in Bubble.io
I know that data privacy might not be the most fascinating feature in Bubble. But believe me - you need to take care of it, and again it is a huge feature. In this section, you can set who should see what and most importantly - who can do what with the data API. While we go through the tutorial, we will do a lot of settings in the data privacy to see the different results.
If you want to use the data or workflow from your no-code Bubble application in other systems, for example, Adalo, you would need to set up everything in Adalo. Before you do that, make sure that you tested your API calls in a system like Postman. It is much easier to set up the API calls and see the results in Postman than in other systems. You can easily copy API calls and authorization tokens. I worked with Postman for years and I never got disappointed.
Now we are prepared and ready to do some testing.
I guess you are wondering whether this is even possible. I mean, we surely want to prevent that people have access without at least our API-Key. Obviously, this doesn't count for data that I'm willing to share with the public. This can be cases like hotels, food items, job offers which I want to share with the public (not log-in users).
In order to keep things simple, I just created a data type object called "Test". In the video tutorials for the Adalo - Bubble.io integration, we use other examples.
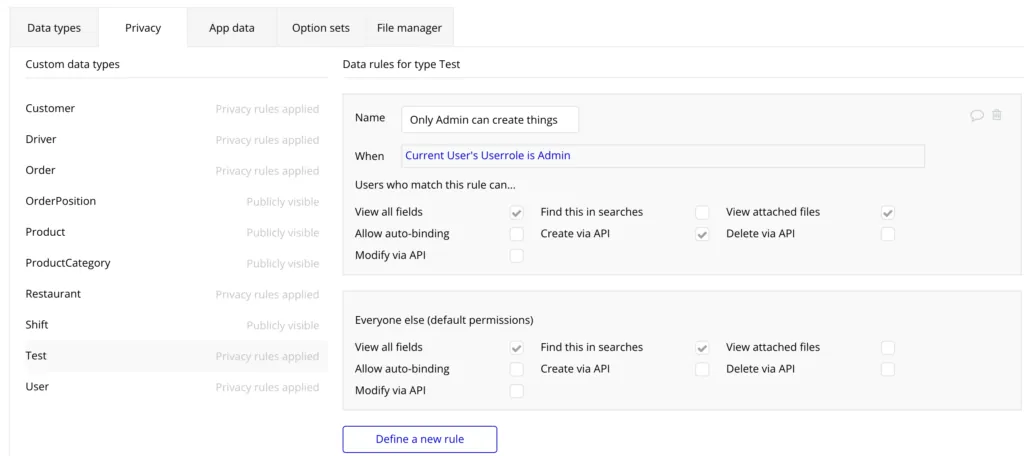
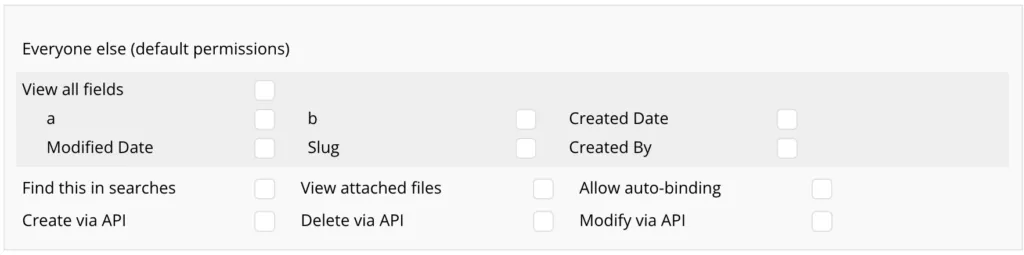
The picture below shows how I set up my data privacy for this test.
Data Privacy rules in Bubble.io for this test
In postman, I'm creating a GET API-Call for the Test Data API. I'm creating this API-Call without any authorization - without the API-Key.

Postman Get Call for this test
The result may or may not surprise you. I can see everything.
If you have a look at the data privacy settings, this doesn't surprise you. I'm saying that everyone else can view all fields. Everyone means literally everyone. It doesn't mean everyone in your bubble.io application. It is really everyone without any authentication.
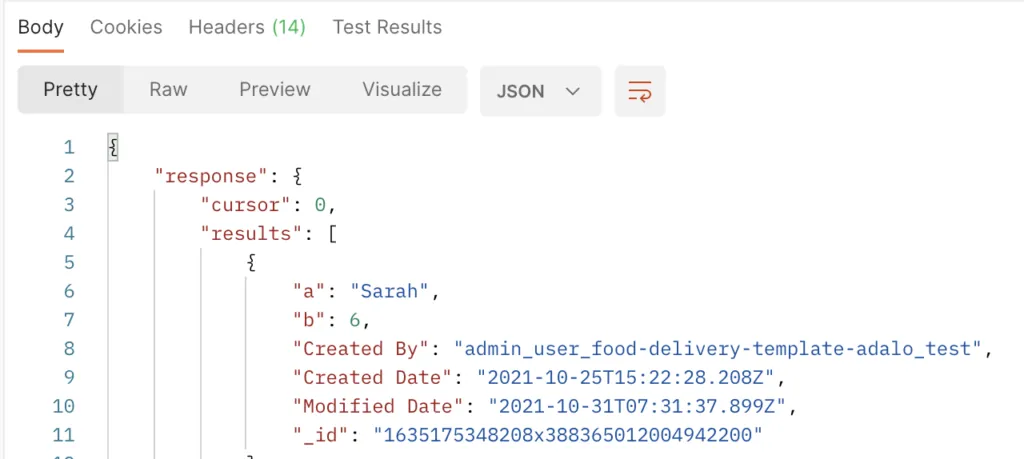
Postman results
Again, they are use cases where you explicitly want this behavior.
While you may say "It's okay if systems without the API Key" can see everything without any kind of authentication, you most likely don't them to delete create, modify or even delete your data.
Let the games begin and see whether we are able to.
Create new objects
The data API from Bubble.io enables us to make the CRUD operations with the data types. CRUD means "Create, Read, Update, Delete". In the first example, we showed that we can read the data without authentication. The screenshot below shows us that we are also to create items without any authentication.
The explanation again is pretty easy - we allowed it in the data privacy settings. Again, everyone means everyone also someone or something outside your bubble.io application.
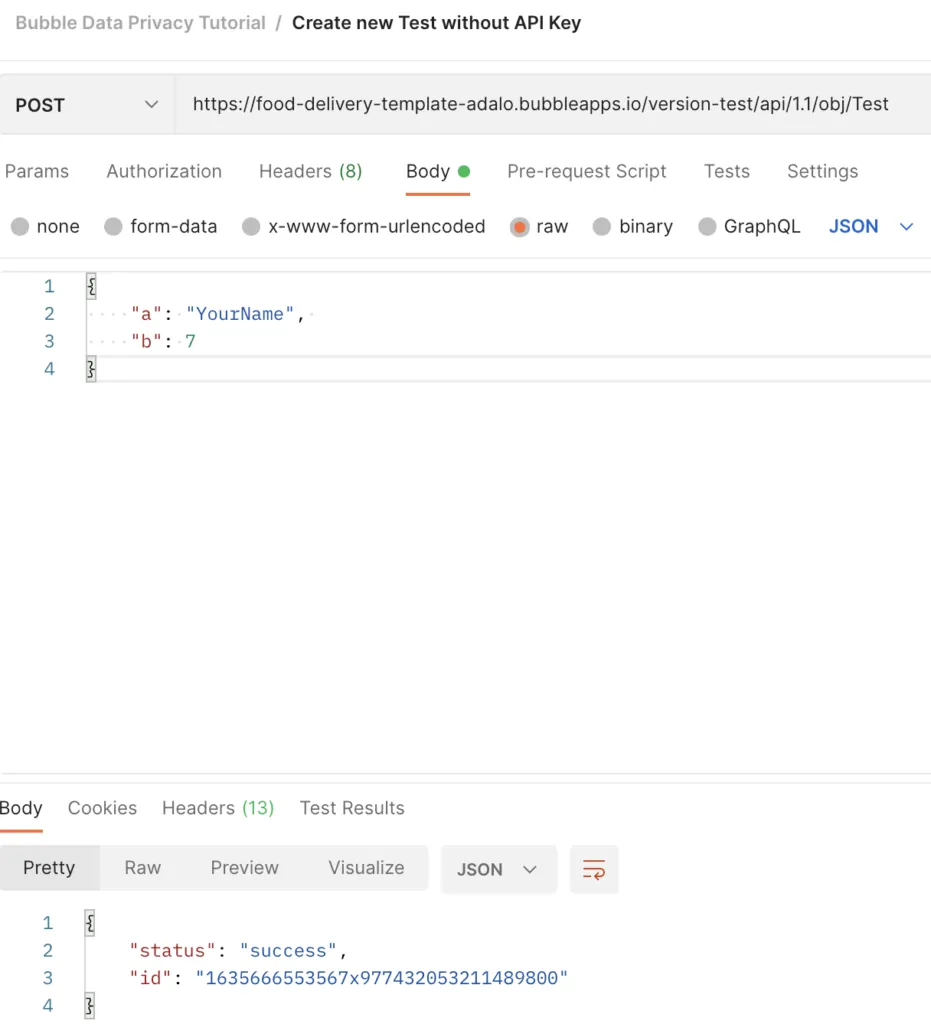
Postman create things in Bubble.io without API-Key
Modify existing objects & delete existing objects
To no surprise, we were also able to modify and delete existing objects. The solution to this behavior is again the settings in the data privacy sections.
What is your learning out of that? Keep a close eye on your data privacy settings, especially if you are handling data APIs which are exposing your data.
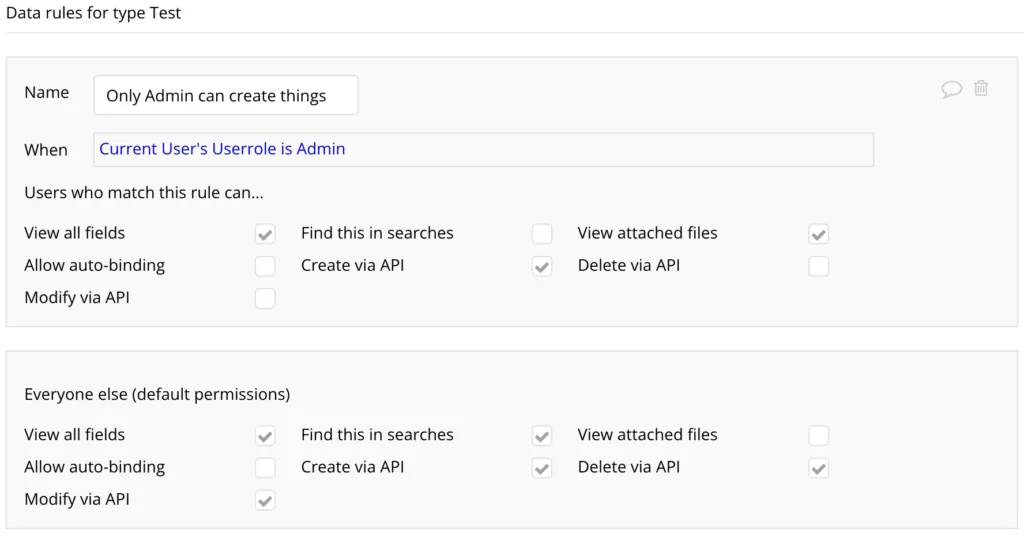
We now changed the data privacy settings so that "everyone else" can't see, create, update or delete anything.
Data Privacy settings in Bubble.io for new test
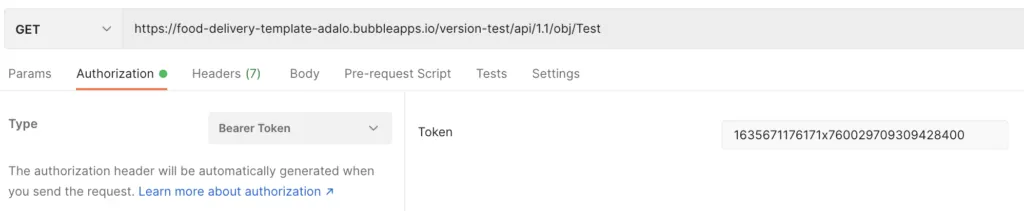
We will use the exact same API-Calls as in the previous example. This time, however, we will use the API-Key as a bearer token. If you have no idea what I'm talking about, please read this article first. https://www.devopsschool.com/blog/what-is-bearer-token-and-how-it-works/
In Postman the authorization for all calls looks like the following.
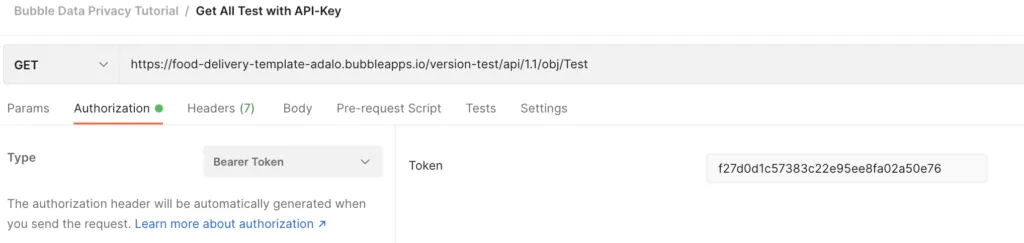
Postman bearer token
While Postman gives me the possibility to say that this is a Bearer Token, most other systems (e.g. Adalo)won't do that. This is not a problem, you just need to be aware of that and find a way to tell the application that this is a Bearer token. Most likely, you would need to write it as follows:
Bearer Token (API-Key) ⇒ While you would need to place the API-Key without brackets.
We were able to read, create, update and delete all items. Which is no surprise at all. The API-Key acts as you would be the admin of the application. You can do everything as you would be doing as the admin of the bubble.io application. That's why we also see that if we create a data entry, it is created by the Admin.

New object created by app admin
We will cover, later on, how this might be problematic for us.
So far we learned why we should be aware of data privacy settings, especially if we are exposing our data via API. On top of that, we learned how to use the API-Key as a Bearer token. Pretty good, I would say.
In the next section, I'll show you the next big thing you won't want to miss. You can create custom backend workflows and expose them to other applications. This can be of great value if you use your Bubble.io as a backend system for other interfaces. This way you can write all your logic in your bubble.io application and allow other systems to use them.
Sounds complicated? Believe me, it's not.
We will use a very simple backend workflow. The same functionality could be achieved using the data API directly, but we are here to learn. In this workflow, I will create a new test object using the given parameters.
Important fact! It is a difference whether you put the parameters in the header or in the body. If you want to put them in the header, you would need to select "Querystring" in Bubble.
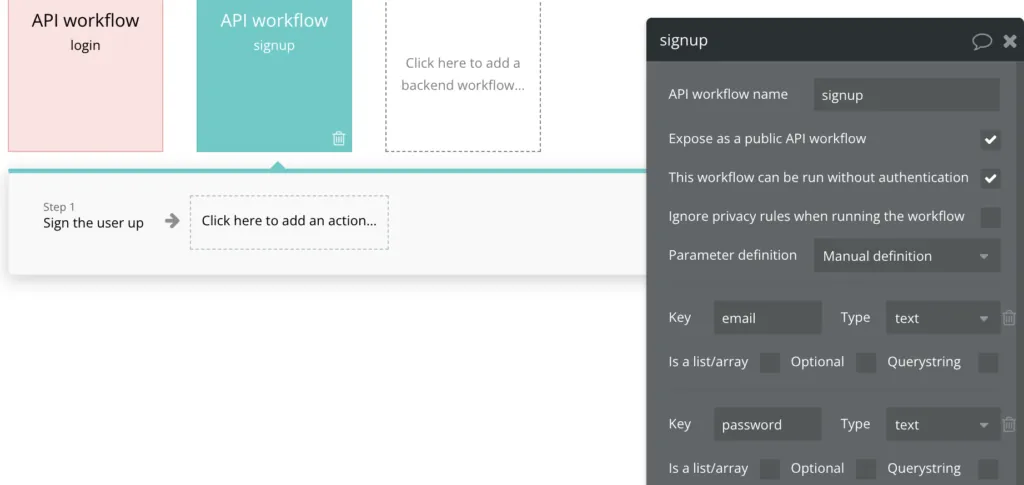
Furthermore, you need to select "Expose as a public API workflow". What does that mean? It means that we can use call this workflow via the API - we are able to use this workflow from other systems outside our bubble.io application. They are other scenarios where you want to use the workflow only inside your application.
On top of that, we want that this workflow can only run with authentication, and privacy rules should not be ignored.
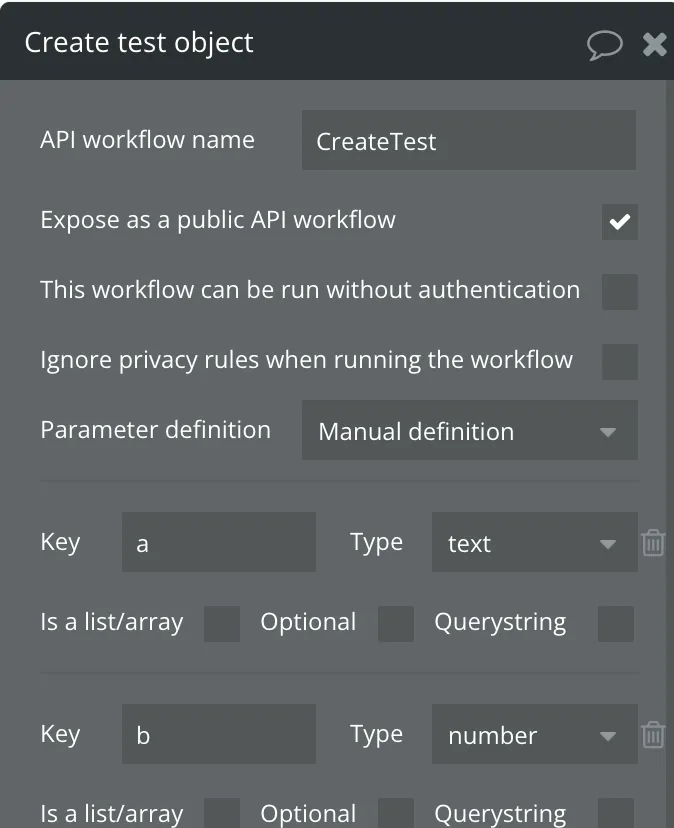
Workflow settings in Bubble.io
The next step is to prepare everything in Postman.
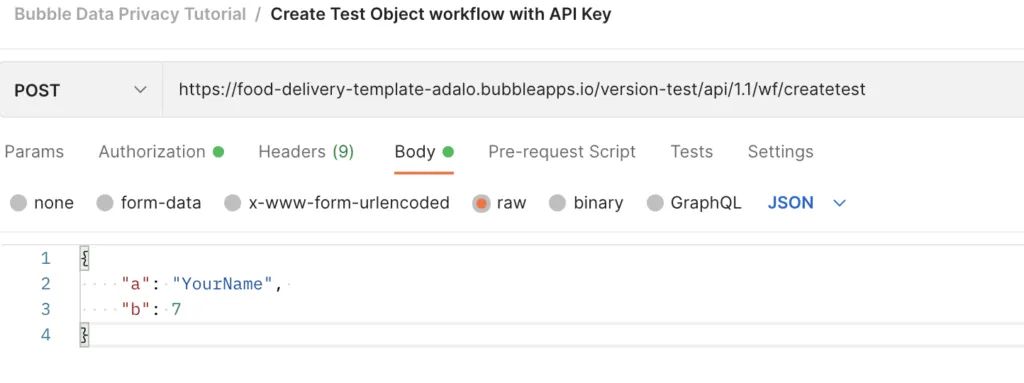
Postman call workflow
The request URL always contains your main URL which can be found in the API section of your bubble.io application as well as the API workflow name.
So far we were able to make all CRUD operations and also call workflows. So we are good to go, right? Unfortunately not.
The API-Key always acts in the context of an admin. This means, if you give this API-Key to an external application, they can do everything in the context of admin. In some cases, this is no problem, and you can sleep calmly at night. However, they are situations where you have no control of the external applications. Why is that problematic? You clearly don't want every user to have admin privileges. That's why we are using data privacy rules and work with user roles. Unfortunately, this doesn't work with the scenarios I showed you.
You would need to implement some kind of user privilege system in your external application which is using the API-Key. As already said this can be possible, but it can also be easier.
Wait, you said easier? Yes, and I will show you how.
What is the actual goal? The goal is that users can somehow be signed up from another application (e.g. Adalo) and also log in from that application. On top of that, we want to be able to run all the workflows and data API always calls in the context of that user.
What are the advantages of doing that?
Now we are getting to the more exciting stuff. I hope you have some beverages and popcorn, we will learn cool stuff.
Create a backend workflow in your bubble.io application. We do need two parameters (email, password) of course you can further modify this. The workflow should be run without authentication. At this point, we don't have any authentication as we want to create a new user.
Bubble.io Workflow Steps Sign user Up
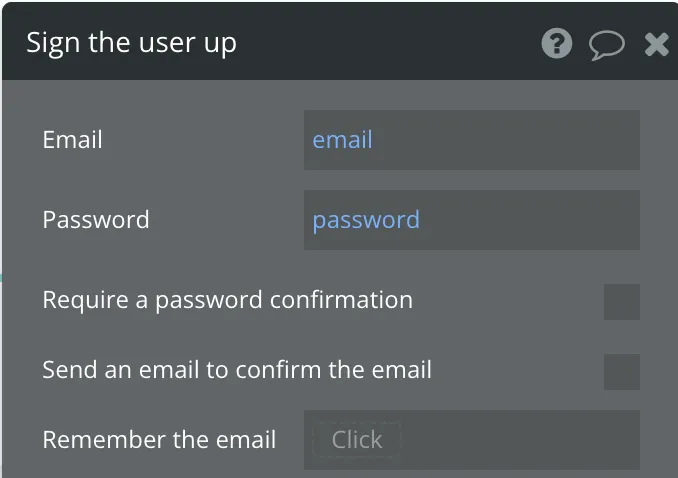
Bubble.io sign user up
So that's it. I'm sorry if you expected more steps. But this is all. Let's try this in Postman.
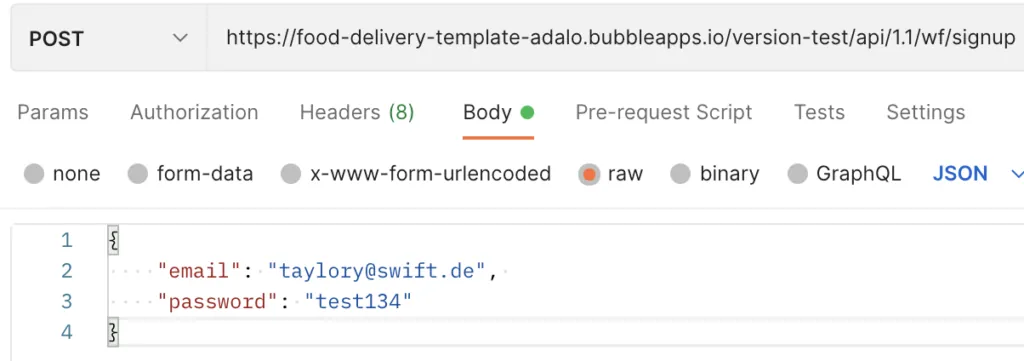
Postman create user workflow
The request address is again your base URL and the name of the workflow. Exactly the same as we did before.
Let's see what we get back.
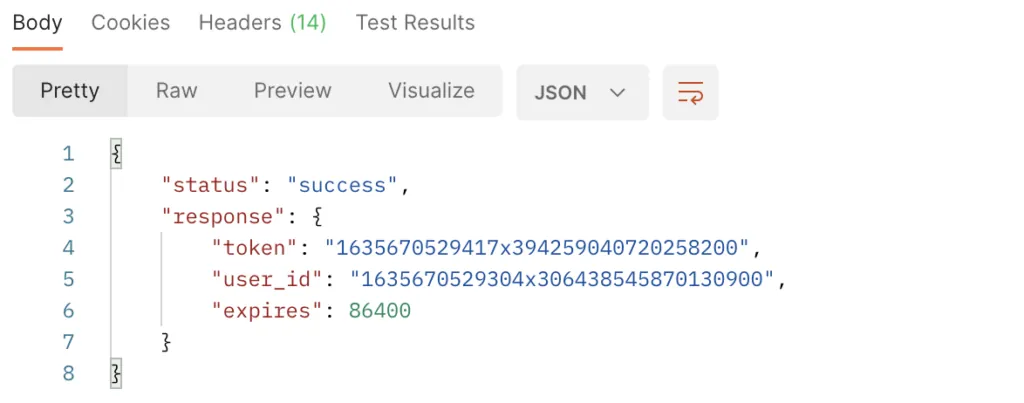
Postman results from create user workflow
It works. We just created a new user (see user_id). The token is exactly what we will need in the future instead of the API-Key. The expires is a number in seconds.
If the user already has an account, we want to let him log in. It is almost the same as we just did with the signup workflow.
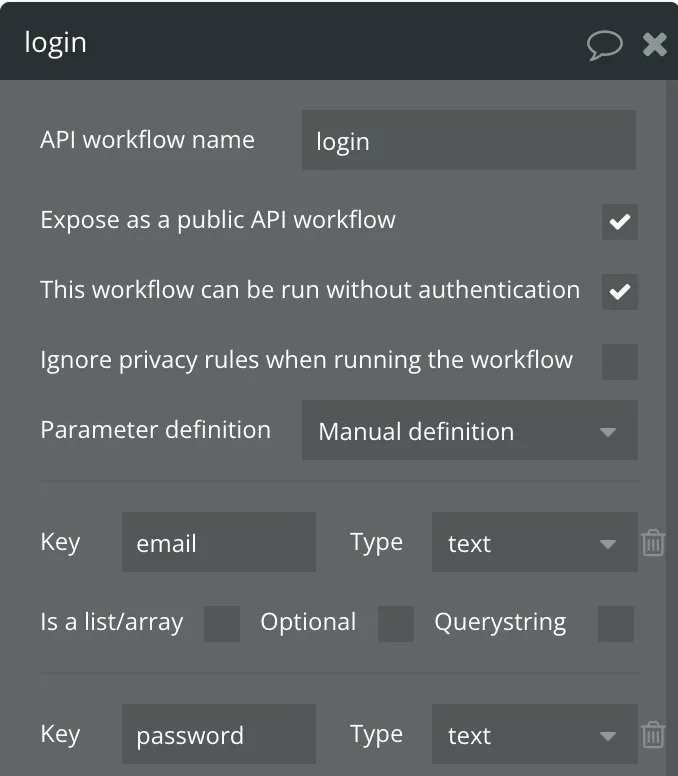
We need a workflow that is of course exposed as a public API workflow, otherwise, the external system wouldn't be able to make this request. Additionally, this workflow must run without authentication, as we don't have any authentication at this moment in time.
The parameters are email and password.
No-Code Bubble Workflow sign user in
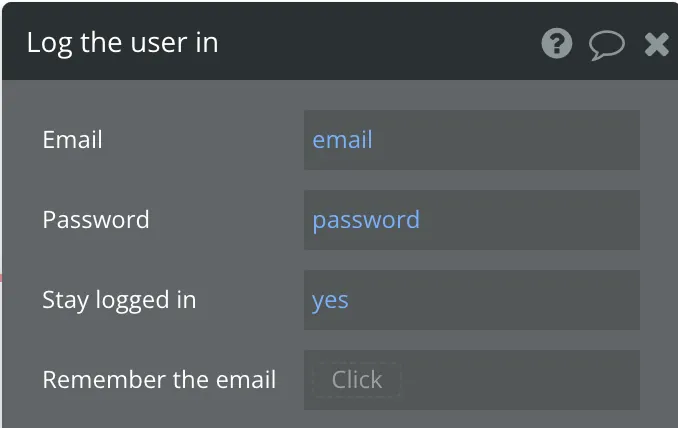
No-Code Bubble Workflow sign user in
I guess this looks very familiar to you, as it is the same you are doing when developing some kind of registration or login.
Let's see what we get back in Postman.

Postman result from user login
And it works. We have everything we need to keep going.
We now can use the token to make API calls instead of the general API-Key. By doing this, we can ensure that we are acting in the context of that specific user. In this example, we are saying that only admins can see all fields. The default user which we just created has not had the role of admin.

Data Privacy admin user
Let's see if this works.
Postman token user without admin role
The result is zero. We do see nothing. Let's change this user to be an admin user.
Let's test again.

Postman results with admin role
It works ;) As this user has the role of an admin, we are getting back the results.
You can play around with it and see that we now have one place to manage all user privileges no matter whether it is inside the application or outside by the use of your no-code bubble application API.
Congratulations - you made it through. You learned a lot about Bearer token, data privacy settings, and how to secure your application in a better way.
Please take some time and play around with it. Use Postman to make requests and get more knowledge.
This foundational knowledge is extremely important for further integrations, for example, if you want to integrate Adalo with Bubble.io. I made a lot of videos for that - check it out to learn more ;)

Erzähle uns in einem kostenlosen Erstgespräch mehr über dein individuelles Projekt. Wir helfen dir bei den nächsten Schritten und teilen unser Wissen.
Nachricht schreiben